
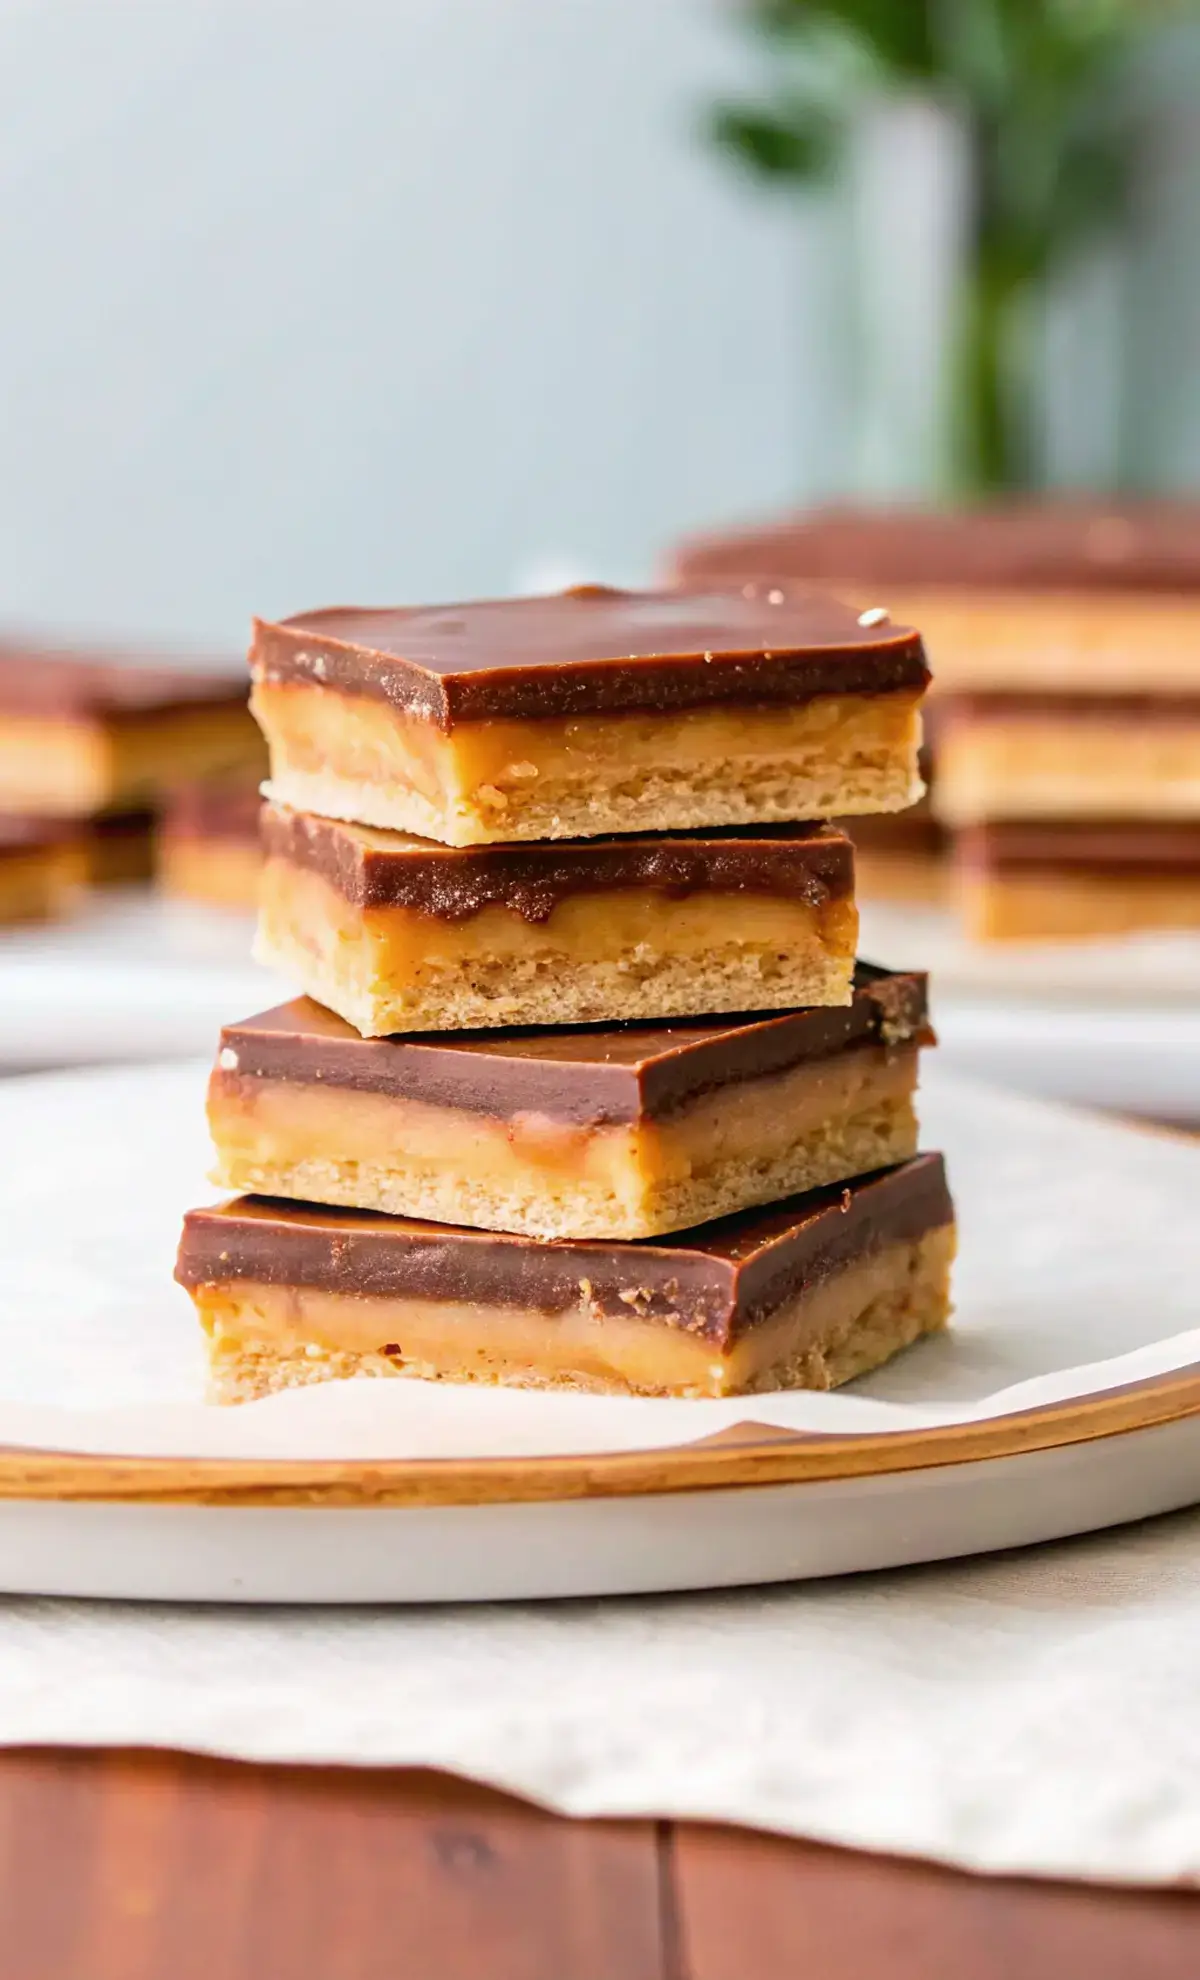
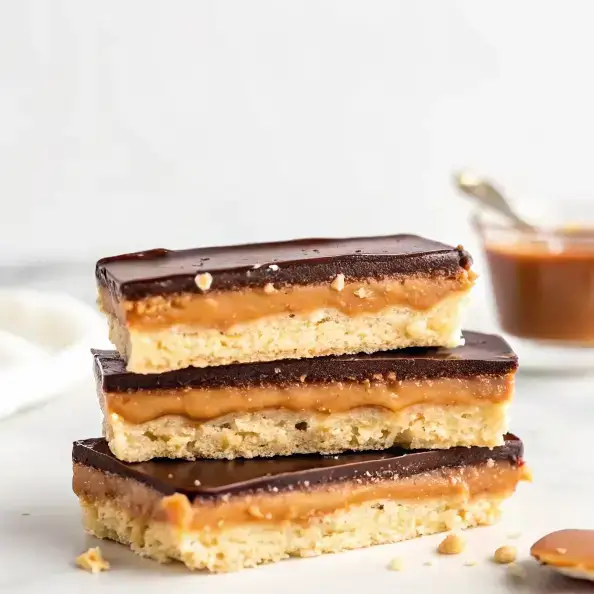
No Bake Twix Squares are the perfect treat for anyone who loves Twix candy bars but wants a quick, homemade version. These delicious bars feature the classic layers of a Twix—a buttery shortbread base, rich caramel filling, and smooth chocolate topping—without needing to turn on the oven.
In this guide, we’ll walk you through how to make No Bake Twix Squares step by step, share expert tips for the best texture, and answer common questions about Twix. Get ready to enjoy a simple, yet irresistible dessert that’s sure to become a favorite!
What Are No Bake Twix Squares?
No Bake Twix Squares are a homemade version of Twix bars that require no baking. They replicate the flavors of a Twix bar with three distinct layers:
- Shortbread Base – A simple, buttery, crumbly layer made from crushed biscuits and melted butter.
- Caramel Filling – A rich, chewy caramel layer that balances the sweetness.
- Chocolate Topping – A smooth and glossy layer of melted chocolate, just like a Twix bar.
Since this recipe requires no oven, it’s perfect for summer months or when you need a quick dessert without heating up your kitchen.
Why You Will Love This Recipe
- Easy & Quick – No need to bake a shortbread crust, making this a beginner-friendly recipe.
- Minimal Ingredients – Uses simple pantry staples like biscuits, butter, condensed milk, and chocolate.
- Perfect for Any Occasion – Great for parties, potlucks, or an after-dinner treat.
- Customizable – You can tweak the recipe with different flavors and toppings.
How Do They Compare to Store-Bought Twix?
While store-bought Twix bars are mass-produced, homemade No Bake Twix Squares have a richer, fresher taste with higher-quality ingredients. Plus, you can control the sweetness, texture, and size of each square.
Ingredients Needed for No Bake Twix Squares
Making No Bake Twix Squares is incredibly easy, thanks to a few simple pantry ingredients. Each layer requires just a handful of ingredients, making this recipe both budget-friendly and quick to prepare.
Shortbread Base Ingredients
The base of these Twix squares mimics the classic shortbread cookie but without baking.
- Crushed biscuits (2 cups) – Digestive biscuits, graham crackers, or shortbread cookies work best.
- Melted butter (½ cup) – Helps bind the crushed biscuits together for a firm base.
- Brown sugar (2 tablespoons) – Adds a slight caramel flavor and extra crunch.
Caramel Layer Ingredients
This rich and chewy caramel layer is the heart of the recipe.
- Sweetened condensed milk (1 can, 14 oz) – Creates a creamy and smooth caramel texture.
- Butter (½ cup, unsalted) – Adds richness and a buttery taste.
- Light brown sugar (½ cup) – Enhances the caramel flavor and thickens the mixture.
- Golden syrup or corn syrup (2 tablespoons) – Prevents sugar crystallization and ensures a smooth caramel consistency.
- Salt (¼ teaspoon) – Balances the sweetness and enhances the caramel flavor.
Chocolate Topping Ingredients
The final layer is a smooth, glossy chocolate topping, just like a Twix bar.
- Milk chocolate or semi-sweet chocolate (1 ½ cups, chopped or chips) – Melts smoothly for an authentic Twix taste.
- Coconut oil or vegetable oil (1 teaspoon, optional) – Helps create a shiny, easy-to-slice chocolate layer.
Optional Additions & Substitutions
- Dark Chocolate – Swap milk chocolate for a deeper, richer flavor.
- Sea Salt – Sprinkle flaky salt on top for a sweet-salty contrast.
- Peanut Butter – Add a thin layer of peanut butter under the caramel for a twist on the classic Twix.
- Gluten-Free Option – Use gluten-free biscuits for the shortbread base.
Craving a protein-packed treat? Try these No-Bake High-Protein Snickers Cookies, the perfect balance of indulgence and nutrition!
Step-by-Step Instructions for Making No Bake Twix Squares
Now that you have all your ingredients ready, it’s time to put everything together. Follow these simple, step-by-step instructions to make your own No Bake Twix Squares at home.
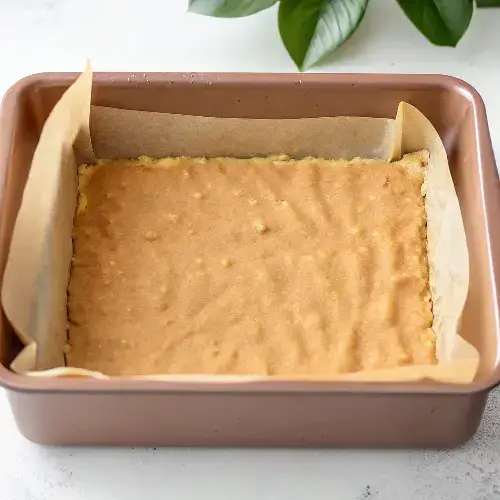
Step 1: Prepare the Shortbread Base
The first layer mimics the buttery shortbread cookie found in a Twix bar, but without the need for baking.
Instructions:
- Crush the biscuits – Place 2 cups of digestive biscuits, graham crackers, or shortbread cookies in a food processor and pulse until they turn into fine crumbs. If you don’t have a food processor, place them in a ziplock bag and crush them with a rolling pin.
- Melt the butter – In a microwave-safe bowl, melt ½ cup of unsalted butter until fully liquid.
- Mix the base – In a large bowl, combine the crushed biscuits, melted butter, and 2 tablespoons of brown sugar. Stir well until the mixture has the texture of wet sand.
- Press into the pan – Line an 8×8-inch square baking dish with parchment paper. Firmly press the biscuit mixture into the bottom to form an even layer. Use the back of a spoon or a flat-bottomed glass to compact it.
- Chill – Place the pan in the refrigerator while you prepare the caramel layer.
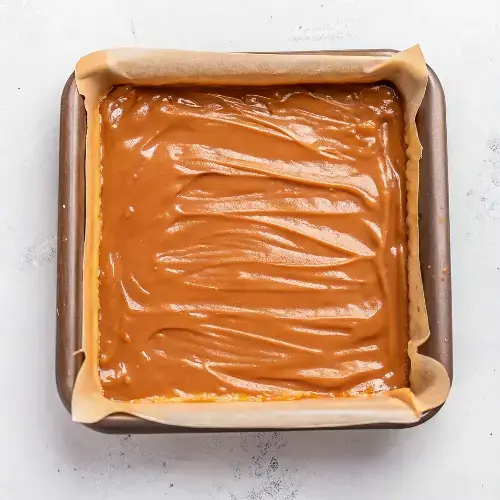
Step 2: Make the Caramel Layer
This rich, chewy caramel layer is what gives No Bake Twix Squares their signature taste.
Instructions:
- Melt the butter and sugar – In a medium saucepan, add ½ cup unsalted butter and ½ cup light brown sugar. Cook over medium heat, stirring constantly, until the sugar dissolves.
- Add condensed milk and syrup – Pour in 1 can (14 oz) sweetened condensed milk and 2 tablespoons golden syrup or corn syrup. Stir well.
- Cook the caramel – Keep the mixture on medium heat, stirring constantly, until it thickens and turns a golden caramel color. This takes about 5–7 minutes.
- Test for doneness – Drop a small amount of caramel into a glass of ice water. If it forms a soft ball, it’s ready.
- Pour over the base – Remove the shortbread base from the fridge and pour the caramel evenly over it. Smooth it out with a spatula.
- Chill – Return the pan to the refrigerator and let the caramel set for at least 30 minutes.
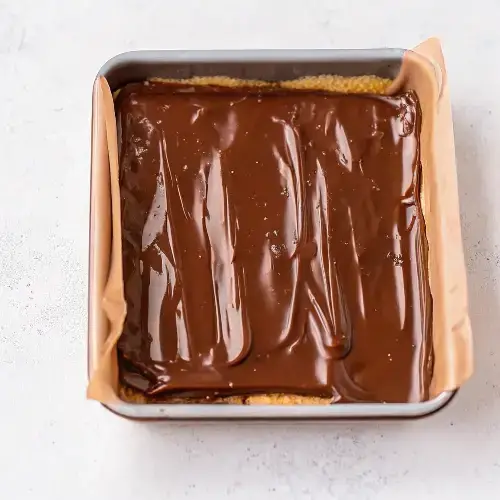
Step 3: Prepare the Chocolate Topping
The final layer is a smooth, glossy chocolate topping that completes the Twix-inspired treat.
Instructions:
- Melt the chocolate – In a microwave-safe bowl, combine 1 ½ cups of chopped milk chocolate or chocolate chips with 1 teaspoon of coconut oil or vegetable oil (optional, for a smoother texture).
- Microwave in intervals – Heat in 30-second intervals, stirring after each one, until the chocolate is completely melted and smooth.
- Pour over the caramel layer – Remove the chilled caramel layer from the fridge and evenly spread the melted chocolate on top. Use an offset spatula to smooth it out.
- Chill again – Place the pan back in the fridge for at least 1 hour, or until the chocolate is fully set.
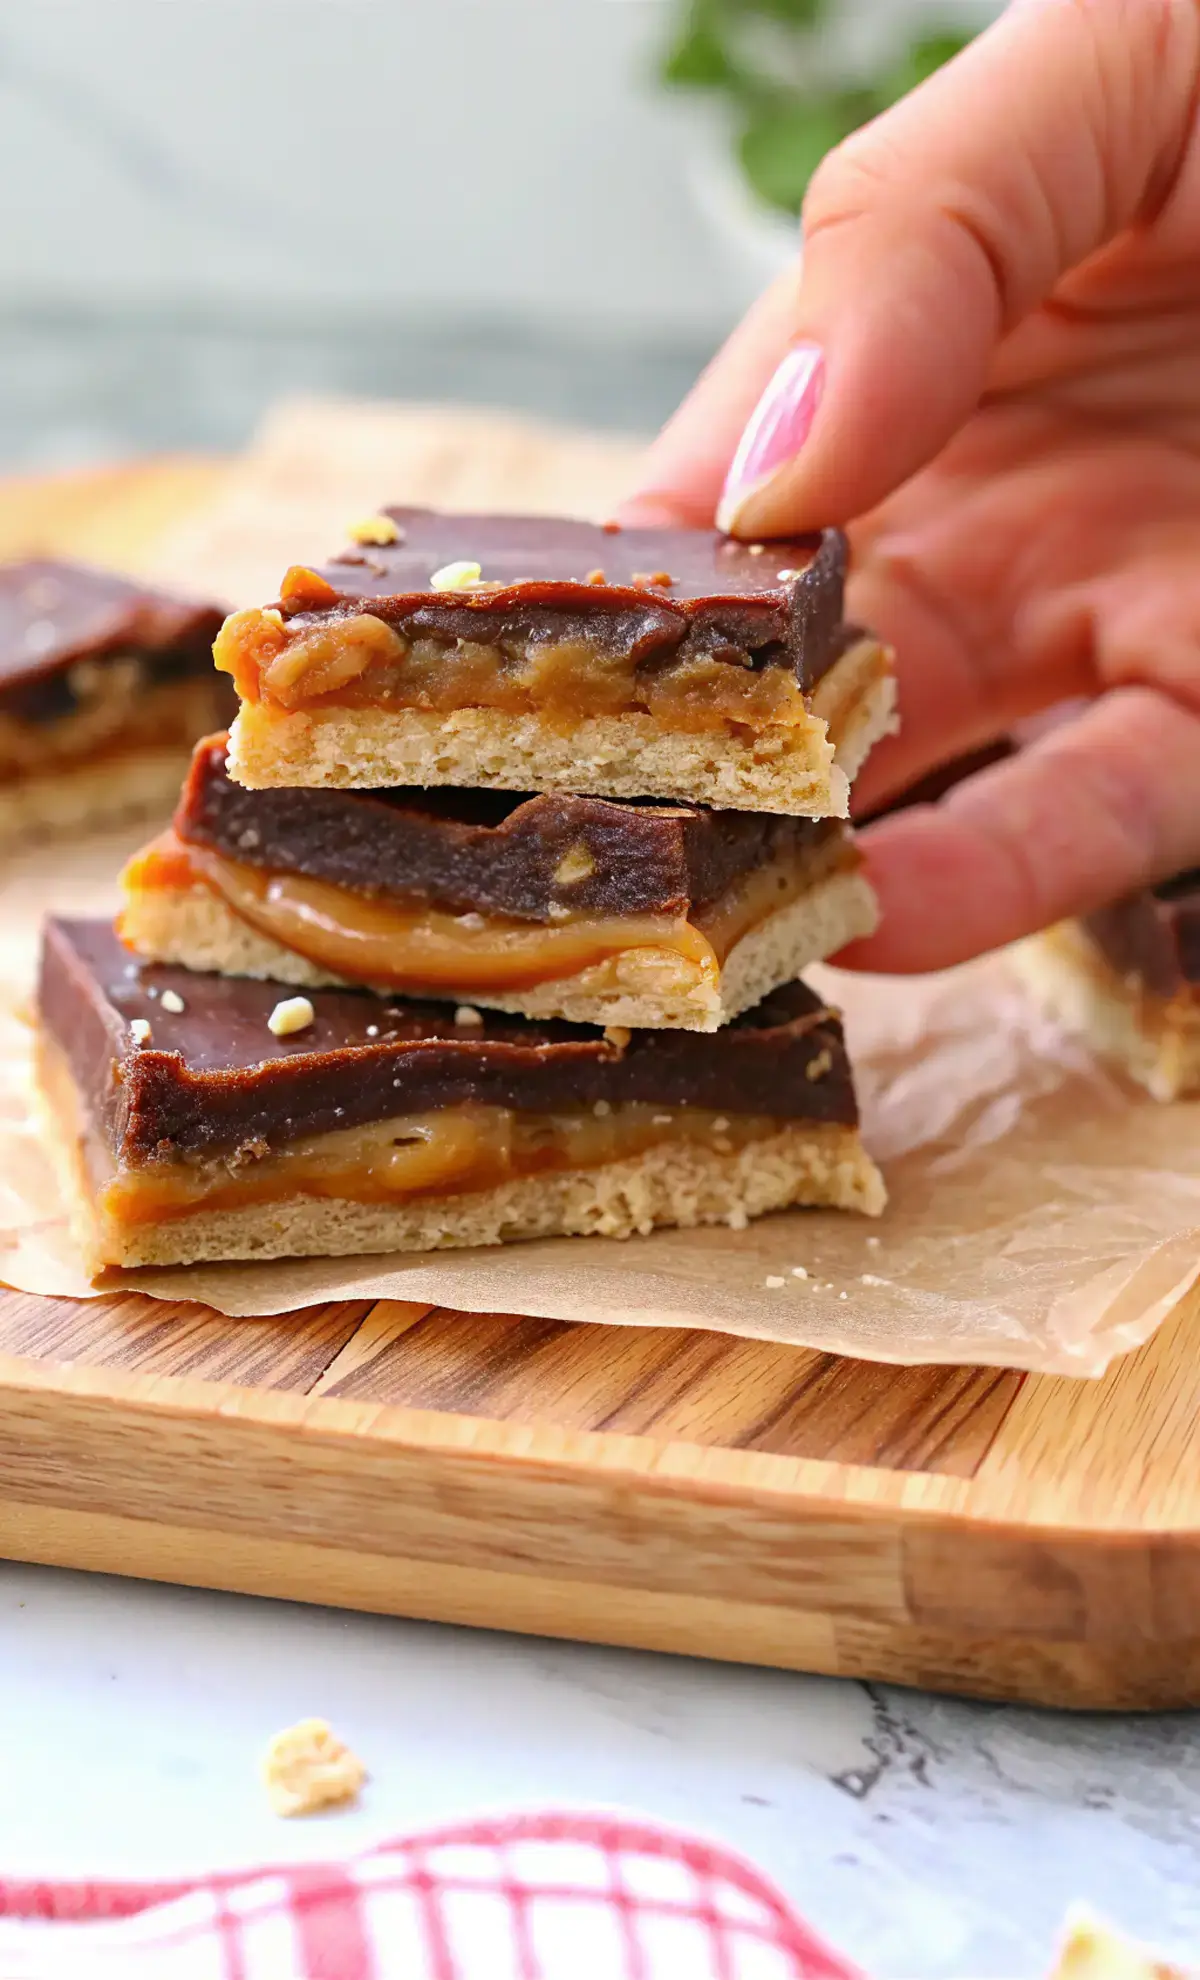
Step 4: Slice & Serve
Once the chocolate is firm, it’s time to cut and enjoy your homemade No Bake Twix Squares!
Instructions:
- Remove from the pan – Lift the parchment paper to take the entire dessert out of the pan.
- Score the chocolate – Let the dessert sit at room temperature for 5 minutes to prevent cracking. Use a sharp knife to score the chocolate layer before cutting.
- Cut into squares – Slice into 16 small squares or 9 larger bars, depending on your preference.
- Serve & enjoy!
For the best texture, store No Bake Twix Squares in an airtight container in the refrigerator for up to 1 week. You can also freeze them for up to 3 months—just thaw before serving.
Tips for Perfect No Bake Twix Squares
Making No Bake Twix Squares is easy, but a few expert tips can help you get the best texture, flavor, and presentation. Here are some pro tips to ensure your Twix-inspired treats turn out perfect every time.
1. Achieving the Perfect Shortbread Base
Since the base isn’t baked, it needs to be firm enough to hold the caramel and chocolate layers.
- Use finely crushed biscuits – The finer the crumbs, the better the base holds together. A food processor works best, but you can also crush them by hand using a ziplock bag and rolling pin.
- Press firmly into the pan – Use the back of a spoon or a flat-bottomed glass to press the mixture evenly and firmly into the pan. This prevents a crumbly base.
- Chill before adding caramel – Let the base set in the refrigerator for at least 15–20 minutes before pouring on the caramel. This keeps the layers from mixing.
2. Mastering the Caramel Layer
The caramel layer is what makes these bars taste like real Twix! Here’s how to get it just right:
- Use a heavy-bottomed saucepan – This prevents the caramel from burning or sticking.
- Stir constantly – Keep stirring while cooking to prevent sugar crystallization and ensure a smooth, thick caramel.
- Cook until golden and thickened – The caramel is ready when it coats the back of a spoon and has a rich golden color. If unsure, drop a little into cold water—if it forms a soft ball, it’s done!
- Let it set before adding chocolate – After pouring the caramel over the base, refrigerate it for at least 30 minutes before adding the chocolate layer.
3. Getting the Chocolate Layer Just Right
The chocolate topping should be smooth, glossy, and easy to slice.
- Use good-quality chocolate – The better the chocolate, the better the flavor. Milk chocolate gives a classic Twix taste, but dark chocolate works too!
- Melt chocolate slowly – If using a microwave, heat in 30-second bursts, stirring in between to prevent burning.
- Add a little oil for shine – Mixing in 1 teaspoon of coconut oil or vegetable oil helps create a smooth, glossy chocolate layer.
- Let the chocolate set properly – Refrigerate for at least 1 hour before slicing.
4. Cutting Without Cracking
To get clean, even squares without cracking the chocolate:
- Let it sit at room temperature for 5 minutes before cutting—this prevents the chocolate from shattering.
- Use a sharp knife and run it under hot water before slicing. Dry it off, then cut straight down.
- Score the chocolate first by lightly marking where you’ll cut before slicing all the way through.
5. Storage & Freezing Tips
No Bake Twix Squares store well and taste even better the next day!
- Refrigerator: Store in an airtight container for up to 1 week.
- Freezer: Wrap squares individually in plastic wrap and freeze for up to 3 months.
- To Serve from Freezer: Let them thaw at room temperature for 10–15 minutes before eating.
Variations & Fun Twists on No Bake Twix Squares
One of the best things about No Bake Twix Squares is how easy they are to customize! Whether you want a healthier version, a different flavor, or a fun twist, there are plenty of ways to make your No Bake Twix Squares unique.
1. Dark Chocolate No Bake Twix Squares
Want a richer, less sweet version? Swap milk chocolate for dark chocolate to create an indulgent batch of No Bake Twix Squares.
✅ Use 70% dark chocolate instead of milk chocolate for a bold, slightly bitter contrast to the sweet caramel.
✅ Sprinkle flaky sea salt on top for a gourmet touch.
Perfect for:
- Dark chocolate lovers
- A more sophisticated dessert
- Reducing overall sweetness
2. Peanut Butter No Bake Twix Squares
A peanut butter twist makes No Bake Twix Squares even more indulgent!
✅ Add a layer of peanut butter between the shortbread and caramel.
✅ Use peanut butter chips instead of milk chocolate for the topping.
✅ Crush peanuts and sprinkle them over the chocolate before it sets.
Perfect for:
- Peanut butter & chocolate fans
- A Reese’s meets Twix experience
- A nutty, protein-packed dessert
3. Vegan & Dairy-Free No Bake Twix Squares
Make this recipe completely plant-based by swapping out the dairy ingredients while still enjoying delicious No Bake Twix Squares.
✅ Use vegan butter for the base and caramel.
✅ Replace condensed milk with coconut condensed milk.
✅ Use dairy-free chocolate like dark chocolate or vegan milk chocolate.
Perfect for:
- Vegans & dairy-free diets
- Those who prefer coconut-based sweets
- A healthier alternative with no animal products
4. Gluten-Free No Bake Twix Squares
A simple swap makes No Bake Twix Squares completely gluten-free!
✅ Use gluten-free biscuits (like gluten-free shortbread or oat-based cookies).
✅ Check labels on all ingredients to ensure they are gluten-free.
Perfect for:
- Gluten-sensitive individuals
- A safe option for those with gluten allergies
5. Holiday-Inspired No Bake Twix Squares
Customize No Bake Twix Squares for different holidays to match the season!
✅ Halloween: Add orange sprinkles or drizzle white chocolate “cobwebs” on top.
✅ Christmas: Mix crushed candy canes into the chocolate topping.
✅ Easter: Use white chocolate and pastel-colored sprinkles for a festive touch.
Perfect for:
- Seasonal celebrations
- Holiday-themed dessert trays
6. Salted Caramel No Bake Twix Squares
A touch of sea salt takes these No Bake Twix Squares to another level!
✅ Stir a pinch of sea salt into the caramel mixture.
✅ Sprinkle flaky salt over the chocolate before it sets.
✅ Use salted butter for a richer, deeper caramel flavor.
Perfect for:
- Sweet & salty dessert lovers
- A gourmet twist on the classic Twix bar
7. White Chocolate No Bake Twix Squares
For a unique twist, swap out the traditional chocolate for white chocolate, creating a delicious variation of No Bake Twix Squares.
✅ Melt white chocolate chips for the topping instead of milk or dark chocolate.
✅ Drizzle caramel over the white chocolate for a marbled effect.
Perfect for:
- White chocolate fans
- A fun, lighter alternative
8. Keto & Low-Carb No Bake Twix Squares
For a sugar-free, low-carb version, try these simple swaps to enjoy No Bake Twix Squares while staying on track with your diet.
✅ Use almond flour shortbread instead of biscuit crumbs.
✅ Make a sugar-free caramel using butter, heavy cream, and a keto-friendly sweetener like erythritol.
✅ Use sugar-free dark chocolate for the topping.
Perfect for:
- Low-carb & keto dieters
- A diabetic-friendly dessert
Frequently Asked Questions (FAQs) About No Bake Twix Squares
Got questions about No Bake Twix Squares? Here are the most common ones, answered in detail to help you master this delicious treat!
1. Is there actually a difference between left Twix and right Twix?
This is a fun marketing campaign by Twix! According to Mars, the company behind Twix, the difference is purely fictional. The “Left Twix” and “Right Twix” are made the same way, but the ads claim that one is drizzled with caramel while the other is dipped. In reality, both Twix bars are identical in ingredients and taste.
2. What do Americans call Twix?
Twix is called Twix in the U.S., just like in most other countries. However, in some parts of the world, similar caramel and biscuit chocolate bars exist under different names. In Australia, for example, there’s a similar treat called the Caramello Koala, and in the UK, there are other caramel biscuit bars, but Twix remains a unique and globally recognized brand.
3. Can you get a single Twix?
Yes! Although Twix bars are most commonly sold in packs of two, you can sometimes find single-bar packs in convenience stores, vending machines, or promotional offers. Additionally, fun-size Twix bars are often sold individually in multi-packs, especially during Halloween and holiday seasons.
4. What is the cookie inside of a Twix?
The cookie inside a Twix bar is a buttery shortbread biscuit, which gives Twix its signature crunch. In No Bake Twix Squares, we replicate this by using crushed biscuits mixed with melted butter to create a no-bake version of the classic shortbread base.
Conclusion & Final Thoughts
No Bake Twix Squares are the ultimate homemade treat, combining the buttery crunch of shortbread, rich caramel, and smooth chocolate into an easy, no-bake dessert. Whether you’re making them for a party, a family gathering, or just to satisfy your sweet tooth, these bars are quick, customizable, and absolutely delicious.
PrintNo Bake Twix Squares

No Bake Twix Squares are the perfect treat for anyone who loves Twix candy bars but wants a quick, homemade version.
- Prep Time: 15 minutes
- chilling: 1 hour
- Cook Time: 10 minutes
- Total Time: 1 hour 25 minutes
- Yield: 16 squares
- Category: Dessert
- Method: No-Bake
- Cuisine: American
- Diet: Vegetarian
Ingredients
Shortbread Base Ingredients
The base of these Twix squares mimics the classic shortbread cookie but without baking.
- Crushed biscuits (2 cups) – Digestive biscuits, graham crackers, or shortbread cookies work best.
- Melted butter (½ cup) – Helps bind the crushed biscuits together for a firm base.
- Brown sugar (2 tablespoons) – Adds a slight caramel flavor and extra crunch.
Caramel Layer Ingredients
This rich and chewy caramel layer is the heart of the recipe.
- Sweetened condensed milk (1 can, 14 oz) – Creates a creamy and smooth caramel texture.
- Butter (½ cup, unsalted) – Adds richness and a buttery taste.
- Light brown sugar (½ cup) – Enhances the caramel flavor and thickens the mixture.
- Golden syrup or corn syrup (2 tablespoons) – Prevents sugar crystallization and ensures a smooth caramel consistency.
- Salt (¼ teaspoon) – Balances the sweetness and enhances the caramel flavor.
Chocolate Topping Ingredients
The final layer is a smooth, glossy chocolate topping, just like a Twix bar.
- Milk chocolate or semi-sweet chocolate (1 ½ cups, chopped or chips) – Melts smoothly for an authentic Twix taste.
- Coconut oil or vegetable oil (1 teaspoon, optional) – Helps create a shiny, easy-to-slice chocolate layer.
Optional Additions & Substitutions
- Dark Chocolate – Swap milk chocolate for a deeper, richer flavor.
- Sea Salt – Sprinkle flaky salt on top for a sweet-salty contrast.
- Peanut Butter – Add a thin layer of peanut butter under the caramel for a twist on the classic Twix.
- Gluten-Free Option – Use gluten-free biscuits for the shortbread base.
Instructions
Step 1: Prepare the Shortbread Base
The first layer mimics the buttery shortbread cookie found in a Twix bar, but without the need for baking.
- Crush the biscuits – Place 2 cups of digestive biscuits, graham crackers, or shortbread cookies in a food processor and pulse until they turn into fine crumbs. If you don’t have a food processor, place them in a ziplock bag and crush them with a rolling pin.
- Melt the butter – In a microwave-safe bowl, melt ½ cup of unsalted butter until fully liquid.
- Mix the base – In a large bowl, combine the crushed biscuits, melted butter, and 2 tablespoons of brown sugar. Stir well until the mixture has the texture of wet sand.
- Press into the pan – Line an 8×8-inch square baking dish with parchment paper. Firmly press the biscuit mixture into the bottom to form an even layer. Use the back of a spoon or a flat-bottomed glass to compact it.
- Chill – Place the pan in the refrigerator while you prepare the caramel layer.
Step 2: Make the Caramel Layer
This rich, chewy caramel layer is what gives No Bake Twix Squares their signature taste.
- Melt the butter and sugar – In a medium saucepan, add ½ cup unsalted butter and ½ cup light brown sugar. Cook over medium heat, stirring constantly, until the sugar dissolves.
- Add condensed milk and syrup – Pour in 1 can (14 oz) sweetened condensed milk and 2 tablespoons golden syrup or corn syrup. Stir well.
- Cook the caramel – Keep the mixture on medium heat, stirring constantly, until it thickens and turns a golden caramel color. This takes about 5–7 minutes.
- Test for doneness – Drop a small amount of caramel into a glass of ice water. If it forms a soft ball, it’s ready.
- Pour over the base – Remove the shortbread base from the fridge and pour the caramel evenly over it. Smooth it out with a spatula.
- Chill – Return the pan to the refrigerator and let the caramel set for at least 30 minutes.
Step 3: Prepare the Chocolate Topping
The final layer is a smooth, glossy chocolate topping that completes the Twix-inspired treat.
- Melt the chocolate – In a microwave-safe bowl, combine 1 ½ cups of chopped milk chocolate or chocolate chips with 1 teaspoon of coconut oil or vegetable oil (optional, for a smoother texture).
- Microwave in intervals – Heat in 30-second intervals, stirring after each one, until the chocolate is completely melted and smooth.
- Pour over the caramel layer – Remove the chilled caramel layer from the fridge and evenly spread the melted chocolate on top. Use an offset spatula to smooth it out.
- Chill again – Place the pan back in the fridge for at least 1 hour, or until the chocolate is fully set.
Step 4: Slice & Serve
Once the chocolate is firm, it’s time to cut and enjoy your homemade No Bake Twix Squares!
- Remove from the pan – Lift the parchment paper to take the entire dessert out of the pan.
- Score the chocolate – Let the dessert sit at room temperature for 5 minutes to prevent cracking. Use a sharp knife to score the chocolate layer before cutting.
- Cut into squares – Slice into 16 small squares or 9 larger bars, depending on your preference.
- Serve & enjoy!
Nutrition
- Serving Size: 1 square
- Calories: 250 kcal
- Sugar: 22g
- Fat: 12g
- Carbohydrates: 30g
- Fiber: 1g
- Protein: 3g
Keywords: no-bake-twix-squares